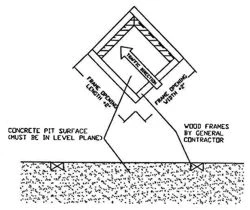
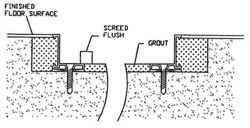
Recessed Frame #448 Installation Manual Installing recessed grate system number 448 Installation Instructions for Frame #448 Note: Before installation begins, make sure that the traffic direction is correct and the rails run perpendicular to the traffic flow. 1. Prepare the floor recess Prepare a recess in the concrete flooring where the grate will be located. The recess should be at least: 1 1/8” deep (subtract finished floor depth from the frame depth—this will be your total block-out depth). 4” wider than the outside dimensions of the frame—this allows 2” on all sides to maneuver the frame into position. 2. Assemble frame, drill anchor holes and secure frame in recess After the recess has been formed and prepared: Assemble frame pieces using the corner locks provided—frame corners are mitered for quick assembly. Set the assembled frame into the recessed opening—square and plumb the frame to the opening and finished floor. (Shim if needed to level with floor). Drill holes every 2’ in the frame and secure using the provided hardware. 3. Pour concrete/grout and level Pour concrete/grout in the center and around the edges flush with surrounding concrete. Level concrete/grout using a board slightly shorter than the frame width. NOTE: Ensure the concrete is smooth and level with the frame—this ensures the grate lies flat without rocking. 4. Recheck all dimensions Before the concrete sets, recheck that: The frame sides are straight The corners are at correct angles so the grate fits properly All inside dimensions match the drawings If the frame bows inward, use spreaders until concrete is fully set. IMPORTANT: The grate is made to fit snugly. The manufacturer is not responsible for improper installation. 5. Protect the frame edges When the concrete has hardened, install plywood or other materials in the recess to protect the edges until the grate is installed.